![]()
![]()
Customizing 1
Customizing 2
Customizing 3
Customizing 4
Customizing 5 here
Customizing 6

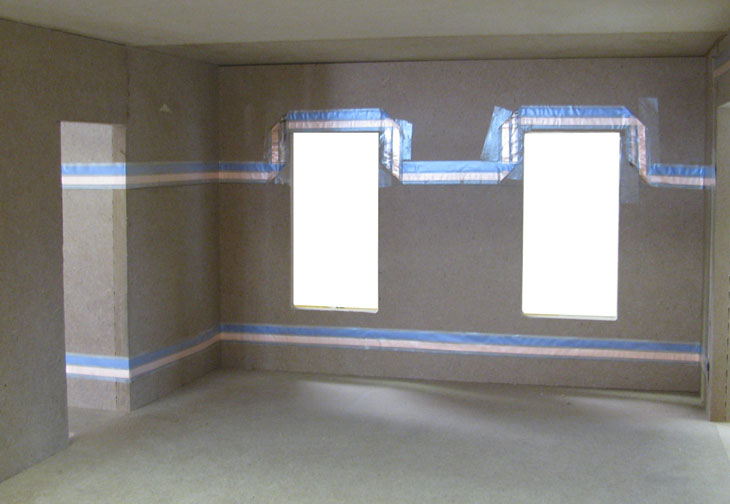
I’ve been finishing up the wiring on my Victoria’s Farmhouse, Running tapewire around the dividers (which I put in after the “up-and-over” runs on each floor), making the connections, and putting a power jack in the foundation. Here’s the diagram that I have been following for this build; the red wires were put in before the dividers:
I didn’t follow the plan exactly, in particular the kneewall and attic ceiling which gave more flexibility for attic lighting, and I have added a bathroom and windows, but having the diagram always gives back more time than it takes.
Today, I will talk about folded corners, eyelet connections, and power jacks.
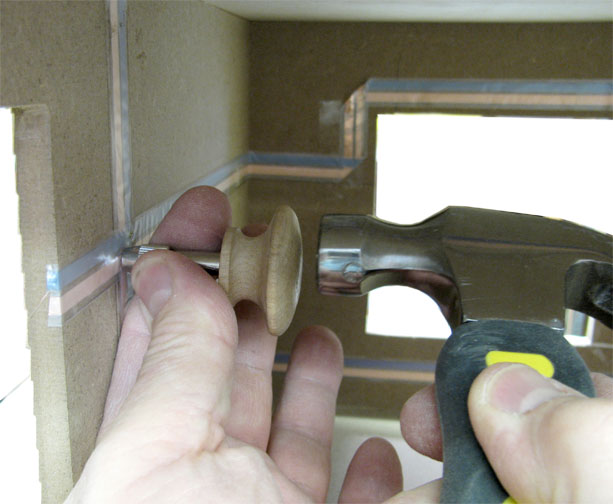
Folded Tapewire Corners: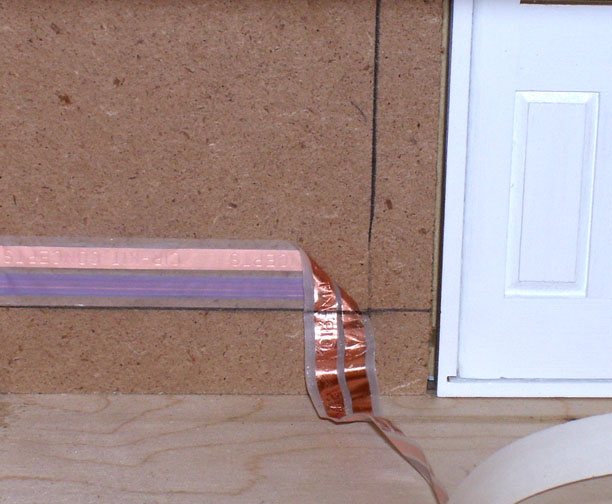
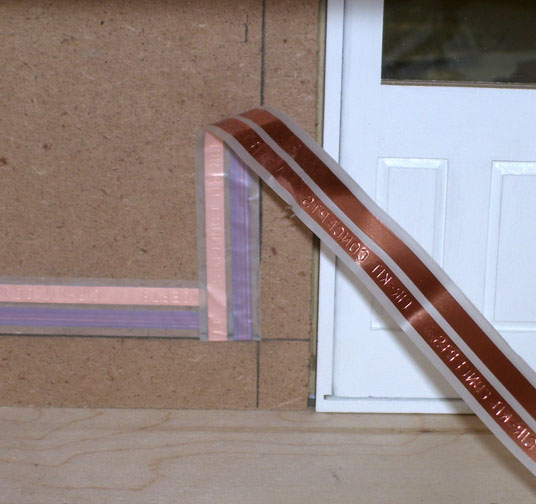
A standard folded corner has two steps: “fold away”; and “fold toward”. That allows the “Fold Toward” to have the adhesive side of the tapewire against the wall.
Both styles of folded corner are thicker than the tapewire, and it leaves a visible lump under the wallpaper unless it is close to a door or window.
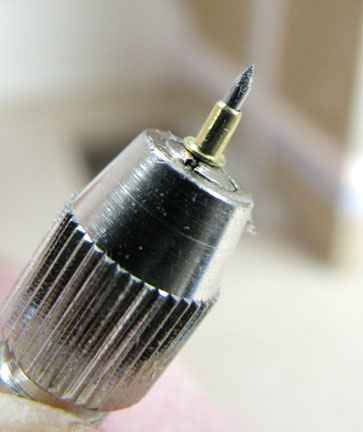
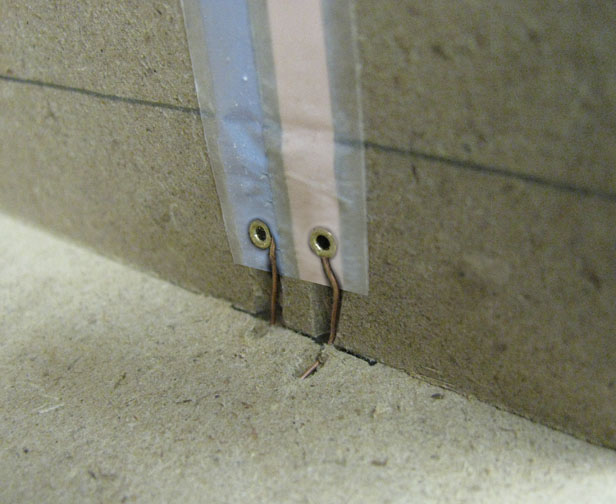
An Eyelet Connection in Tapewire
No matter how careful you are with the wiring plan, there will still be several connections. This connection uses Small Eyelets to join the runs, one eyelet to join the copper colored line, and one eyelet to join the blue colored line. I am using the EL-66 insertion tool; it makes the eyelet hole, supports the eyelet so it doesn’t bend, and is small and sturdy so I can use it to drive in the eyelets (a “whacker-backer” protects the dollhouse from my over-zealous whacking).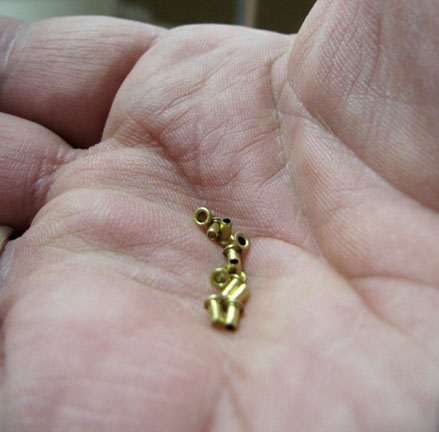
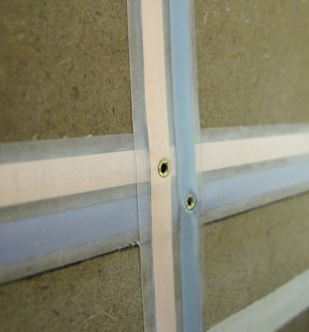
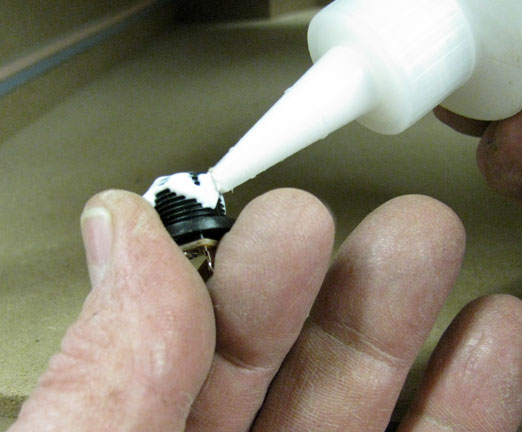
The Power Jack
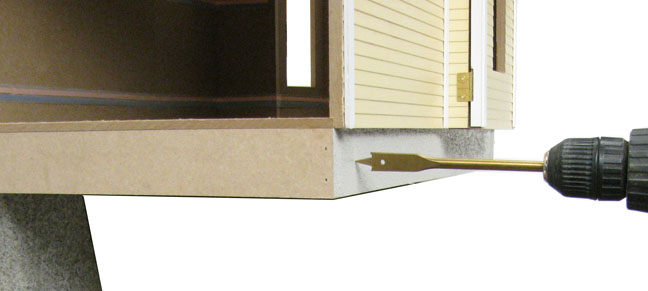
Another change I am making is to use a power jack instead of the regular Junction Splice. A power jack is less visible than a junction splice, and it is more (much more!) robust. Here’s how to install one.Drill holes (or use an electrification slot) to get the wiring into the foundation:
Whether you use a power drill or a finger drill, try to make the hole come out right next to the wall. 
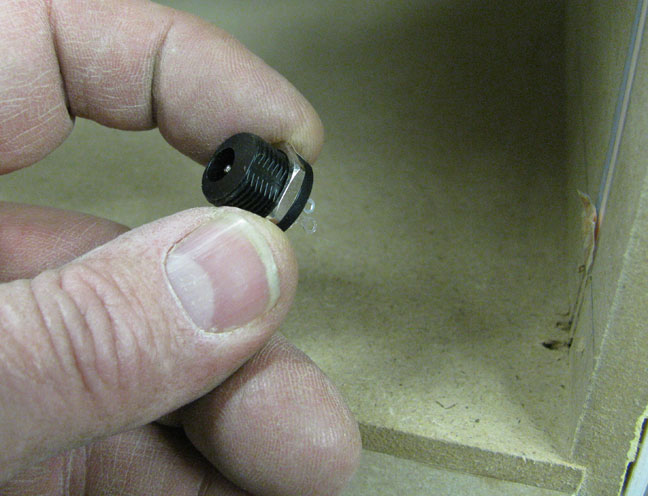
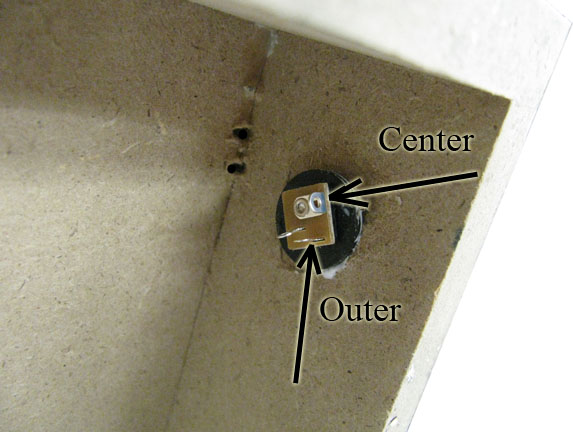
Drill a 1/2″ hole for the Jack – I use (and recommend) the #247 Jack and a right angle plug. The Center lead will be wired to the copper and the Outer lead will go to the blue.
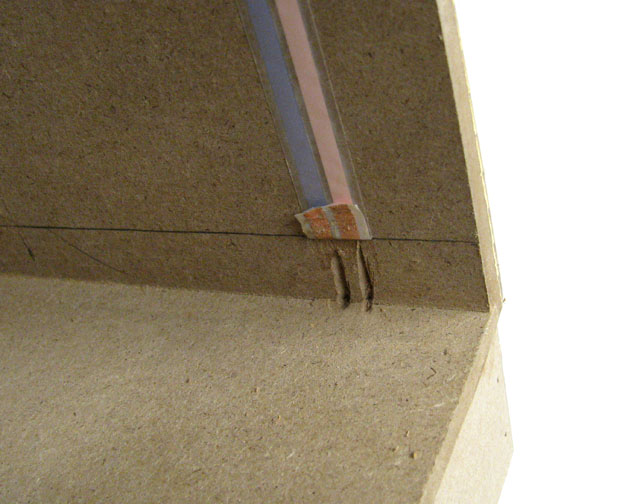
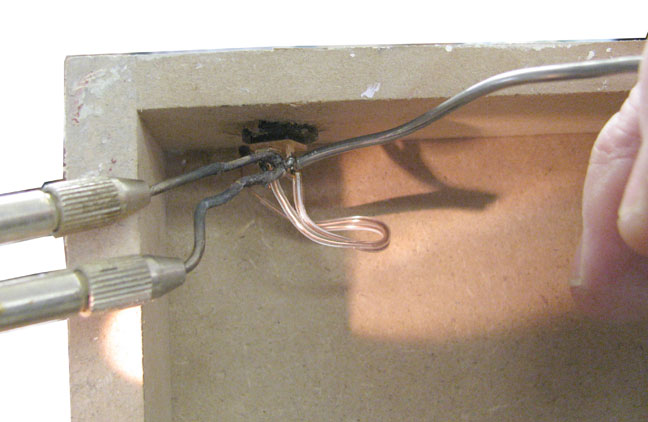
I have grooved the wall with a craft knife so the wires won’t push out on the Baseboard. I use speaker wire for this, run it through the holes, eyelet it to the tapewire, and solder it to the jack.
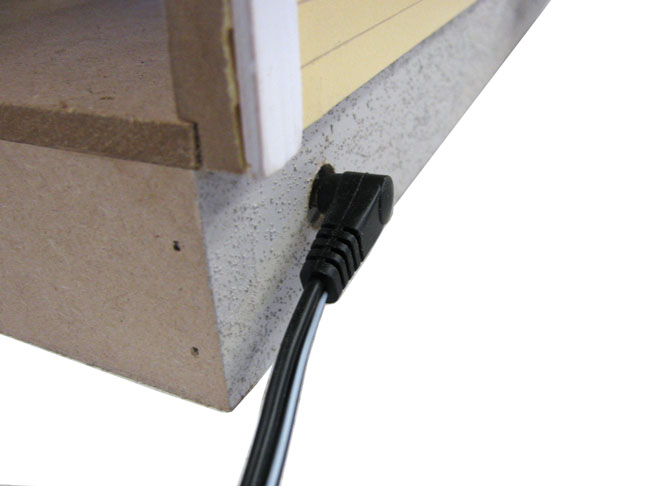 |
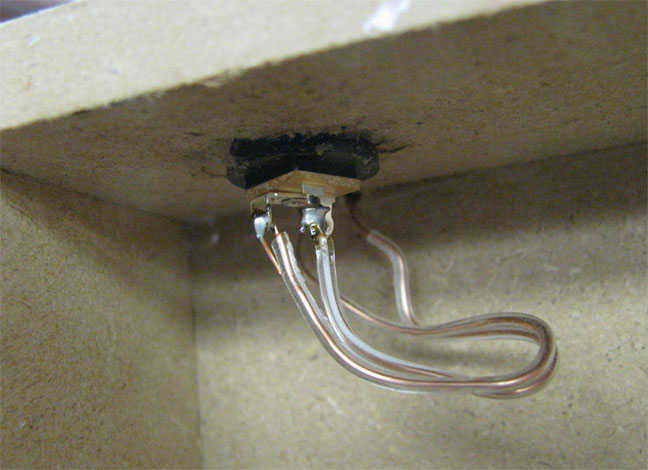
That’s it – neat and tidy. I would have used the same process to get wire to the jack that’s at the heart of the ET-250 Electrified Turntable, which is my other “most favorite” way to get power into a dollhouse. Here’s a YouTube Movie. |
I’ve got work to do
Gary